
Mattermostは、セキュリティを念頭に置いて作成された無料のオープンソースコラボレーションおよびメッセージングプラットフォームです。 これはDiscordまたはSlackの代替であり、1対1のメッセージング、無制限の検索履歴とファイル共有機能、2要素認証、通知など、多くの便利な機能を提供します。 これは、GolangとReactで記述されたセルフホストのオンラインチャットサービスです。 組織や企業向けに特別に設計されており、チームはどこからでも安全に通信できます。
このチュートリアルでは、MattermostChatサーバーをDebian11にインストールする方法を紹介します。
前提条件
- Debian11を実行しているサーバー。
- サーバーIPを指す有効なドメイン名。
- ルートパスワードはサーバーで構成されます。
MariaDBデータベースサーバーをインストールして構成する
Mattermostは、データベースバックエンドとしてMySQLまたはMariaDBを使用します。 そのため、MariaDBサーバーをサーバーにインストールする必要があります。 次のコマンドを使用してインストールできます。
apt-get install mariadb-server -y
MariaDBがインストールされたら、MariaDBサービスを開始し、システムの再起動時に開始できるようにします。
systemctl start mariadb
systemctl enable mariadb
次に、次のコマンドを使用してMariaDBシェルに接続します。
mysql
接続したら、次のコマンドを使用してデータベースとユーザーを作成します。
MariaDB [(none)]> create database mattermost;
MariaDB [(none)]> create user [email protected] identified by 'password';
次に、次のコマンドを使用して、Mattermostデータベースにすべての権限を付与します。
MariaDB [(none)]> grant all privileges on mattermost.* to [email protected];
次に、特権をフラッシュし、次のコマンドを使用してMariaDBシェルを終了します。
MariaDB [(none)]> flush privileges;
MariaDB [(none)]> exit;
終了したら、次のステップに進むことができます。
Mattermostをインストールする
まず、次のコマンドを使用して、Mattermostの専用ユーザーを作成します。
useradd --system --user-group mattermost
次に、次のコマンドを使用してMattermostの最新バージョンをダウンロードします。
wget https://releases.mattermost.com/6.0.2/mattermost-6.0.2-linux-amd64.tar.gz
ダウンロードが完了したら、次のコマンドを使用してダウンロードしたファイルを抽出します。
tar -xvzf mattermost-6.0.2-linux-amd64.tar.gz
次に、次のコマンドを使用して、抽出したディレクトリを/optに移動します。
mv mattermost /opt
次に、次のコマンドを使用して、最も重要なデータディレクトリを作成します。
mkdir /opt/mattermost/data
次に、次のコマンドを使用して、最も重要なディレクトリの所有権を変更します。
chown -R mattermost:mattermost /opt/mattermost
chmod -R g+w /opt/mattermost
次に、次のコマンドを使用してconfig.jsonファイルを編集します。
nano /opt/mattermost/config/config.json
次の行を見つけます。
    "DriverName": "postgres",
    "DataSource": "postgres://mmuser:[email protected]/mattermost_test?sslmode=disableu0026connect_timeout=10",
また、データベースの設定に従って、次の行に置き換えます。
"DriverName": "mysql",
"DataSource": "mattermost:[email protected](127.0.0.1:3306)/mattermost?charset=utf8mb4,utf8u0026readTimeout=30su0026writeTimeout=30s",
終了したら、ファイルを保存して閉じます。
MattermostのSystemdサービスファイルを作成する
次に、Mattermostのsystemdサービスファイルを作成する必要があります。 次のコマンドを使用して作成できます。
nano /etc/systemd/system/mattermost.service
次の行を追加します。
[Unit]
Description=Mattermost
After=syslog.target network.target mysqld.service

[Service]
Type=notify
WorkingDirectory=/opt/mattermost
User=mattermost
ExecStart=/opt/mattermost/bin/mattermost
PIDFile=/var/spool/mattermost/pid/master.pid
TimeoutStartSec=3600
LimitNOFILE=49152

[Install]
WantedBy=multi-user.target
ファイルを保存して閉じてから、systemdデーモンをリロードして変更を適用します。
systemctl daemon-reload
次に、Mattermostを起動し、システムの再起動時に起動できるようにします。
systemctl start mattermost
systemctl enable mattermost
次に、次のコマンドを使用してMattermostのステータスを確認します。
systemctl status mattermost
次の出力が得られます。広告
? mattermost.service - Mattermost
     Loaded: loaded (/etc/systemd/system/mattermost.service; disabled; vendor preset: enabled)
     Active: active (running) since Fri 2021-11-12 13:56:25 UTC; 4s ago
   Main PID: 2888 (mattermost)
      Tasks: 31 (limit: 4679)
     Memory: 273.3M
        CPU: 12.191s
     CGroup: /system.slice/mattermost.service
             ??2888 /opt/mattermost/bin/mattermost
             ??2915 plugins/com.mattermost.plugin-channel-export/server/dist/plugin-linux-amd64
             ??2925 plugins/playbooks/server/dist/plugin-linux-amd64
             ??2931 plugins/focalboard/server/dist/plugin-linux-amd64

Nov 12 13:56:24 debian11 mattermost[2888]: {"timestamp":"2021-11-12 13:56:24.681 Z","level":"info","msg":"Scheduling next survey for Dec 3, 2>
Nov 12 13:56:25 debian11 mattermost[2888]: {"timestamp":"2021-11-12 13:56:25.064 Z","level":"info","msg":"Post.Message has size restrictions">
Nov 12 13:56:25 debian11 mattermost[2888]: {"timestamp":"2021-11-12 13:56:25.084 Z","level":"info","msg":"info [2021-11-12 13:56:25.083 Z] co>
Nov 12 13:56:25 debian11 mattermost[2888]: {"timestamp":"2021-11-12 13:56:25.131 Z","level":"info","msg":"n    -- collation of mattermost's >
Nov 12 13:56:25 debian11 mattermost[2888]: {"timestamp":"2021-11-12 13:56:25.491 Z","level":"info","msg":"debug [2021-11-12 13:56:25.488 Z] i>
Nov 12 13:56:25 debian11 mattermost[2888]: {"timestamp":"2021-11-12 13:56:25.777 Z","level":"info","msg":"info [2021-11-12 13:56:25.777 Z] Se>
Nov 12 13:56:25 debian11 mattermost[2888]: {"timestamp":"2021-11-12 13:56:25.963 Z","level":"info","msg":"Starting Server...","caller":"app/s>
Nov 12 13:56:25 debian11 mattermost[2888]: {"timestamp":"2021-11-12 13:56:25.964 Z","level":"info","msg":"Server is listening on [::]:8065",">
Nov 12 13:56:25 debian11 mattermost[2888]: {"timestamp":"2021-11-12 13:56:25.964 Z","level":"info","msg":"Sending systemd READY notification.>
Nov 12 13:56:25 debian11 systemd[1]: Started Mattermost.
NginxをMattermostのリバースプロキシとして構成する
デフォルトでは、Mattermostはポート8065でリッスンします。したがって、ポート80でMattermostにアクセスするために、リバースプロキシとしてNginxをインストールして構成することをお勧めします。最初に、次のコマンドでNginxをインストールします。
apt-get install nginx -y
Nginxがインストールされたら、次のコマンドを使用してNginx仮想ホスト構成ファイルを作成します。
nano /etc/nginx/conf.d/mattermost.conf
次の行を追加します。
upstream mattermost {
   server localhost:8065;
   keepalive 32;
}

proxy_cache_path /var/cache/nginx levels=1:2 keys_zone=mattermost_cache:10m max_size=3g inactive=120m use_temp_path=off;

server {
   listen 80;
   server_name mattermost.example.com;

   location ~ /api/v[0-9]+/(users/)?websocket$ {
       proxy_set_header Upgrade $http_upgrade;
       proxy_set_header Connection "upgrade";
       client_max_body_size 50M;
       proxy_set_header Host $http_host;
       proxy_set_header X-Real-IP $remote_addr;
       proxy_set_header X-Forwarded-For $proxy_add_x_forwarded_for;
       proxy_set_header X-Forwarded-Proto $scheme;
       proxy_set_header X-Frame-Options SAMEORIGIN;
       proxy_buffers 256 16k;
       proxy_buffer_size 16k;
       client_body_timeout 60;
       send_timeout 300;
       lingering_timeout 5;
       proxy_connect_timeout 90;
       proxy_send_timeout 300;
       proxy_read_timeout 90s;
       proxy_pass http://mattermost;
   }

   location / {
       client_max_body_size 50M;
       proxy_set_header Connection "";
       proxy_set_header Host $http_host;
       proxy_set_header X-Real-IP $remote_addr;
       proxy_set_header X-Forwarded-For $proxy_add_x_forwarded_for;
       proxy_set_header X-Forwarded-Proto $scheme;
       proxy_set_header X-Frame-Options SAMEORIGIN;
       proxy_buffers 256 16k;
       proxy_buffer_size 16k;
       proxy_read_timeout 600s;
       proxy_cache mattermost_cache;
       proxy_cache_revalidate on;
       proxy_cache_min_uses 2;
       proxy_cache_use_stale timeout;
       proxy_cache_lock on;
       proxy_http_version 1.1;
       proxy_pass http://mattermost;
   }
}
ファイルを保存して閉じ、次のコマンドを使用して構文エラーがないかNginx構成を確認します。
nginx -t
次の出力が表示されます。
nginx: the configuration file /etc/nginx/nginx.conf syntax is ok
nginx: configuration file /etc/nginx/nginx.conf test is successful
次に、Nginxサービスを開始して、変更を適用します。
systemctl start nginx
次のコマンドを使用して、Nginxのステータスを確認することもできます。
systemctl status nginx
次の出力が得られるはずです。
? nginx.service - A high performance web server and a reverse proxy server
     Loaded: loaded (/lib/systemd/system/nginx.service; enabled; vendor preset: enabled)
     Active: active (running) since Fri 2021-11-12 13:57:02 UTC; 1min 12s ago
       Docs: man:nginx(8)
    Process: 3384 ExecStartPre=/usr/sbin/nginx -t -q -g daemon on; master_process on; (code=exited, status=0/SUCCESS)
    Process: 3392 ExecStart=/usr/sbin/nginx -g daemon on; master_process on; (code=exited, status=0/SUCCESS)
   Main PID: 3602 (nginx)
      Tasks: 3 (limit: 4679)
     Memory: 6.6M
        CPU: 55ms
     CGroup: /system.slice/nginx.service
             ??3602 nginx: master process /usr/sbin/nginx -g daemon on; master_process on;
             ??3604 nginx: worker process
             ??3605 nginx: worker process

Nov 12 13:57:01 debian11 systemd[1]: Starting A high performance web server and a reverse proxy server...
Nov 12 13:57:02 debian11 systemd[1]: nginx.service: Failed to parse PID from file /run/nginx.pid: Invalid argument
Nov 12 13:57:02 debian11 systemd[1]: Started A high performance web server and a reverse proxy server.
この時点で、Nginxがインストールされ、Mattermostのリバースプロキシとして構成されています。 これで、次のステップに進むことができます。
MattermostWebインターフェイスへのアクセス
次に、Webブラウザーを開き、URLを使用してMattermostWebインターフェースにアクセスします。 http://mattermost.example.com。 次のページにリダイレクトされます。広告
管理者のメールアドレス、ユーザー名、パスワードを入力し、をクリックします 作成 アカウント ボタン。 次のページが表示されます。
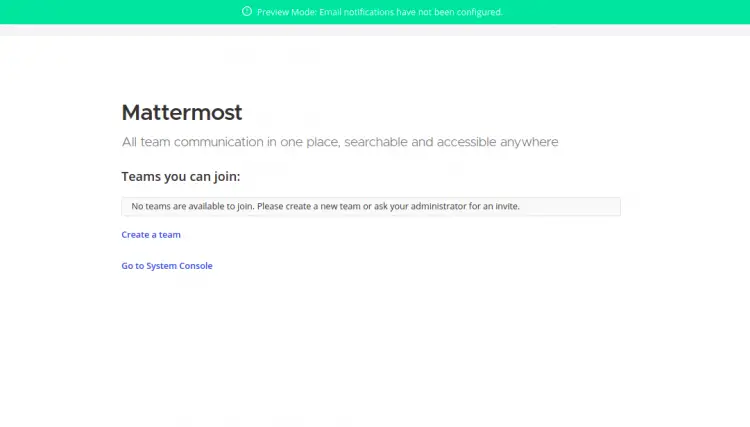
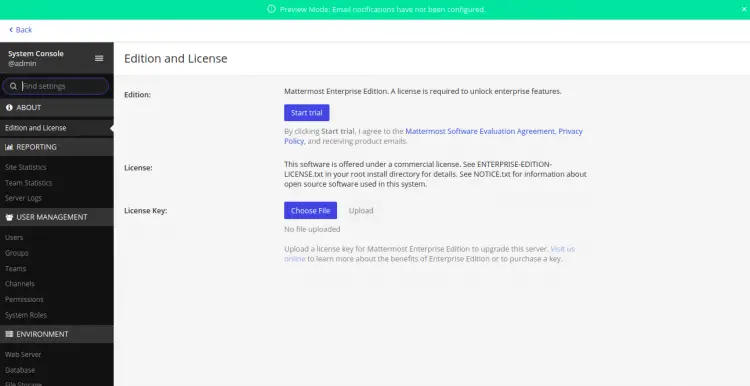
次に、をクリックします システムコンソールに移動します。 以下に示すように、Mattermostダッシュボードにリダイレクトされます。
結論
おめでとう! これで、Debian 11にリバースプロキシとしてNginxを使用してMattermostを正常にインストールできました。これで、組織にMattermostを実装し、チームがどこからでも相互に通信できるようになります。
The post Debian11にMattermostをインストールする方法 appeared first on Gamingsym Japan.