このチュートリアルでは、OpenCart を Ubuntu 22.04 LTS にインストールする方法を紹介します。 ご存じない方のために説明すると、OpenCart はオープンソースの PHP ベースのオンライン e コマース ソリューションです。 プラットフォームの機能を拡張するのに役立つ多くのプラグインを提供し、ユーザー管理、マルチストア機能、アフィリエイト、割引、複数の支払いゲートウェイ、製品レビューなどの機能が含まれています.
この記事は、少なくとも Linux の基本的な知識があり、シェルの使い方を知っていること、そして最も重要なこととして、自分の VPS でサイトをホストしていることを前提としています。 インストールは非常に簡単で、root アカウントで実行していることを前提としています。sudo‘ root 権限を取得するコマンドに。 Ubuntu 22.04 (Jammy Jellyfish) に OpenCart 無料のオープン ソース e コマース プラットフォームを段階的にインストールする方法を紹介します。 Ubuntu 22.04 や、Linux Mint、Elementary OS、Pop!_OS などの他の Debian ベースのディストリビューションでも同じ手順に従うことができます。
前提条件
- 次のオペレーティング システムのいずれかを実行しているサーバー: Ubuntu 22.04、20.04、および Linux Mint などのその他の Debian ベースのディストリビューション。
- 潜在的な問題を防ぐために、OS の新規インストールを使用することをお勧めします。
- サーバーへの SSH アクセス (デスクトップの場合はターミナルを開きます)。
- あ
non-root sudo userまたはへのアクセスroot user. として活動することをお勧めします。non-root sudo userただし、ルートとして行動するときに注意しないと、システムに損害を与える可能性があるためです。
Ubuntu 22.04 LTS Jammy Jellyfish に OpenCart をインストールする
ステップ 1. まず、次のコマンドを実行して、すべてのシステム パッケージが最新であることを確認します。 apt ターミナルでのコマンド。
sudo apt update
sudo apt upgrade
ステップ 2. Ubuntu 22.04 に LAMP スタックをインストールします。
このチュートリアルを開始する前に、LAMP サーバーをサーバーにインストールする必要があります。 LAMP スタックがインストールされていない場合は、こちらのガイドに従ってください。
ステップ 3. Ubuntu 22.04 に OpenCart をインストールします。
デフォルトでは、OpenCart は Ubuntu 22.04 ベース リポジトリでは使用できません。 以下のコマンドを実行して、次のコマンドを使用して Git リポジトリから OpenCart の最新バージョンをダウンロードします。
wget https://github.com/opencart/opencart/releases/download/4.0.0.0/opencart-4.0.0.0.zip
ダウンロードが完了したら。 これを解凍する必要があります /var/www/html/opencart/ ディレクトリ:
unzip opencart-4.0.0.0.zip -d /var/www/html/opencart/
次に、OpenCart 構成ファイルをコピーします。
sudo cp /var/www/html/opencart/upload/{config-dist.php,config.php}
sudo cp /var/www/html/opencart/upload/admin/{config-dist.php,config.php}
いくつかのフォルダーのアクセス許可を変更する必要があります。
sudo chown -R www-data:www-data /var/www/html/opencart/
ステップ 4. OpenCart 用に OpenCart を構成します。
デフォルトでは、MariaDB は強化されていません。 を使用して MariaDB を保護できます。 mysql_secure_installation 脚本。 root パスワードを設定し、匿名ユーザーを削除し、リモート ルート ログインを禁止し、テスト データベースと安全な MariaDB へのアクセスを削除する各手順を注意深く読む必要があります。
mysql_secure_installation
次のように構成します。
- Set root password? [Y/n] y
- Remove anonymous users? [Y/n] y
- Disallow root login remotely? [Y/n] y
- Remove test database and access to it? [Y/n] y
- Reload privilege tables now? [Y/n] y
次に、MariaDB コンソールにログインして、OpenCart 用のデータベースを作成する必要があります。 次のコマンドを実行します。
mysql -u root -p
パスワードの入力を求めるプロンプトが表示されるので、MariaDB ルート パスワードを入力して Enter キーを押します。 データベース サーバーにログインしたら、OpenCart インストール用のデータベースを作成する必要があります。
MariaDB [(none)]> CREATE DATABASE opencart;
MariaDB [(none)]> CREATE USER 'opencart'@'localhost' IDENTIFIED BY 'Your-Strong-Password';
MariaDB [(none)]> GRANT ALL PRIVILEGES ON opencart . * TO 'opencart'@'localhost';
MariaDB [(none)]> FLUSH PRIVILEGES;
MariaDB [(none)]> exit;
ステップ 5. OpenCart 用に Apache 仮想ホストを構成します。
次に、OpenCart 用の Apache 仮想ホストを作成します。
nano /etc/apache2/sites-available/opencart.conf
次のファイルを追加します。
<VirtualHost *:80>
 ServerAdmin admin@your-domain.com
 DocumentRoot /var/www/html/opencart/upload/
 ServerName your-domain.com
 ServerAlias www.your-domain.com

 ErrorLog ${APACHE_LOG_DIR}/error.log
 CustomLog ${APACHE_LOG_DIR}/access.log combined

 <Directory /var/www/html/opencart/upload/>
        Options FollowSymlinks
        AllowOverride All
        Require all granted
 </Directory>
</VirtualHost>
ファイルを保存して閉じ、Apache ウェブサーバーを再起動して変更を有効にします。
sudo a2ensite opencart.conf
sudo a2enmod rewrite
sudo a2enmod ssl rewrite
sudo systemctl restart apache2
ステップ 6. Let’s Encrypt で OpenCart を保護します。
まず、Let’s Encrypt で SSL 証明書を取得するには、Certbot をインストールする必要があります。
sudo apt install certbot python3-certbot-apache
次に、次の手順に従って、Let’s Encrypt で SSL 証明書を取得します。
sudo certbot --apache
インタラクティブなプロンプトに従って、証明書をインストールする必要があります。 2 つのドメインがあるため、両方のドメインに SSL 証明書をインストールします。
Saving debug log to /var/log/letsencrypt/letsencrypt.log
Enter email address (used for urgent renewal and security notices)
 (Enter 'c' to cancel): idroot@your-domain.com

- - - - - - - - - - - - - - - - - - - - - - - - - - - - - - - - - - - - - - - -
Please read the Terms of Service at
https://letsencrypt.org/documents/LE-SA-v1.2-November-15-2017.pdf. You must
agree in order to register with the ACME server. Do you agree?
- - - - - - - - - - - - - - - - - - - - - - - - - - - - - - - - - - - - - - - -
(Y)es/(N)o: Y
- - - - - - - - - - - - - - - - - - - - - - - - - - - - - - - - - - - - - - - -
Would you be willing, once your first certificate is successfully issued, to
share your email address with the Electronic Frontier Foundation, a founding
partner of the Let's Encrypt project and the non-profit organization that
develops Certbot? We'd like to send you email about our work encrypting the web,
EFF news, campaigns, and ways to support digital freedom.
- - - - - - - - - - - - - - - - - - - - - - - - - - - - - - - - - - - - - - - -
(Y)es/(N)o: N
Account registered.

Which names would you like to activate HTTPS for?
- - - - - - - - - - - - - - - - - - - - - - - - - - - - - - - - - - - - - - - -
1: your-domain.com
2: www.your-domain.com
- - - - - - - - - - - - - - - - - - - - - - - - - - - - - - - - - - - - - - - -
Select the appropriate numbers separated by commas and/or spaces, or leave input
blank to select all options shown (Enter 'c' to cancel): 1,2
Requesting a certificate for your-domain.com and www.your-domain.com
Successfully received certificate.
Certificate is saved at: /etc/letsencrypt/live/your-domain.com/fullchain.pem
Key is saved at:         /etc/letsencrypt/live/your-domain.com/privkey.pem
This certificate expires on 2022-12-16.
These files will be updated when the certificate renews.
Certbot has set up a scheduled task to automatically renew this certificate in the background.

Deploying certificate
Successfully deployed certificate for domain.com to /etc/apache2/sites-available/www.your-domain.com-le-ssl.conf
Successfully deployed certificate for www.domain.com to /etc/apache2/sites-available/www.your-domain.com-le-ssl.conf
Congratulations! You have successfully enabled HTTPS on https://domain.com and https://www.your-domain.com

- - - - - - - - - - - - - - - - - - - - - - - - - - - - - - - - - - - - - - - -
If you like Certbot, please consider supporting our work by:
 * Donating to ISRG / Let's Encrypt:   https://letsencrypt.org/donate
 * Donating to EFF:                    https://eff.org/donate-le
- - - - - - - - - - - - - - - - - - - - - - - - - - - - - - - - - - - - - - - -
ステップ 7. 自動更新 SSL をセットアップします。
Let’s Encrypt 証明書の有効期間は 90 日間であり、有効期限が切れる前に証明書を更新することを強くお勧めします。 次のコマンドを実行して、証明書の自動更新をテストできます。
sudo certbot renew --dry-run
ステップ 8.ファイアウォールを設定して下さい。
ここで、HTTP および HTTPS のデフォルト Web ポートでのパブリック アクセスを許可するために、Apache で複雑でないファイアウォール (UFW) をセットアップします。
sudo ufw allow OpenSSH
sudo ufw allow 'Apache Full'
sudo ufw enable
ステップ 9. OpenCart Web インターフェイスへのアクセス。
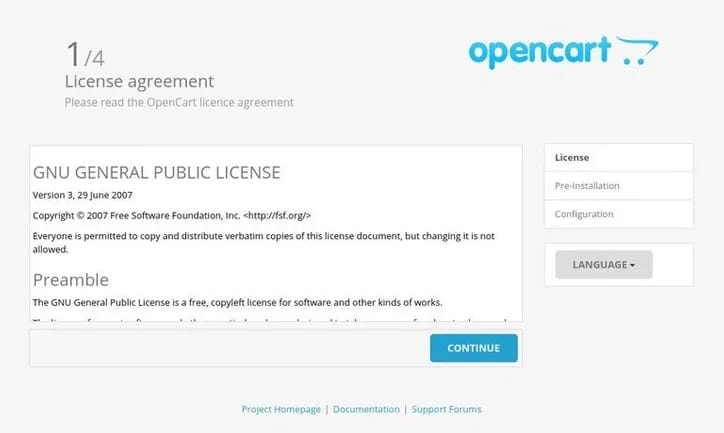
正常にインストールされたら、Web ブラウザを開き、URL を使用して OpenCart インストール ウィザードにアクセスします。 https://your-domain.com. 次のページにリダイレクトされます。

おめでとう! OpenCart が正常にインストールされました。 OpenCart with LAMP を Ubuntu 22.04 LTS Jammy Jellyfish システムにインストールするためにこのチュートリアルを使用していただきありがとうございます。 追加のヘルプまたは有用な情報については、以下を確認することをお勧めします オープンカートのウェブサイト.
VPS マネージ サービスの提供
The post Ubuntu 22.04 LTS に OpenCart をインストールする方法 appeared first on Gamingsym Japan.
