With the release of iOS 13, iPadOS, and macOS Catalina, the Notes app has several useful and new features. Users get gallery mode for better note browsing, more powerful search when attaching images, and a better way to use checklists.
BY TOPIC: How to create contact groups on iPhone and iPad.
In addition to all this, the Notes app has also expanded the sharing options. Now you can optionally share entire folders and restrict access to items to only view them. This is useful for showing other users your notes without them being able to make changes.
BY TOPIC: Gestures for working with text on iPhone and iPad that you might not know about.
How to Create a Shared Notes Folder on iPhone and iPad
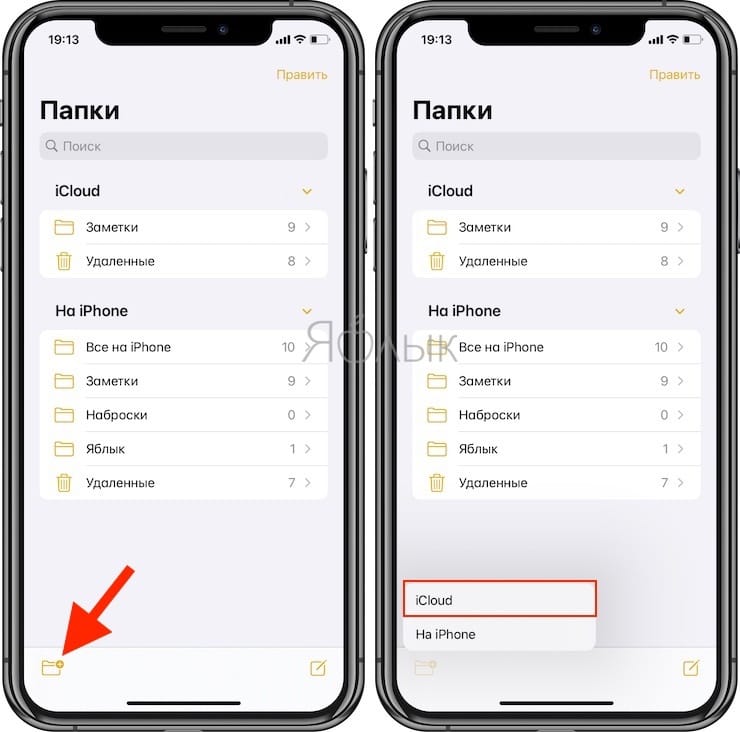
To create a notes folder, open the main page of the application and click the button new folder. Select iCloud from the pop-up context menu.
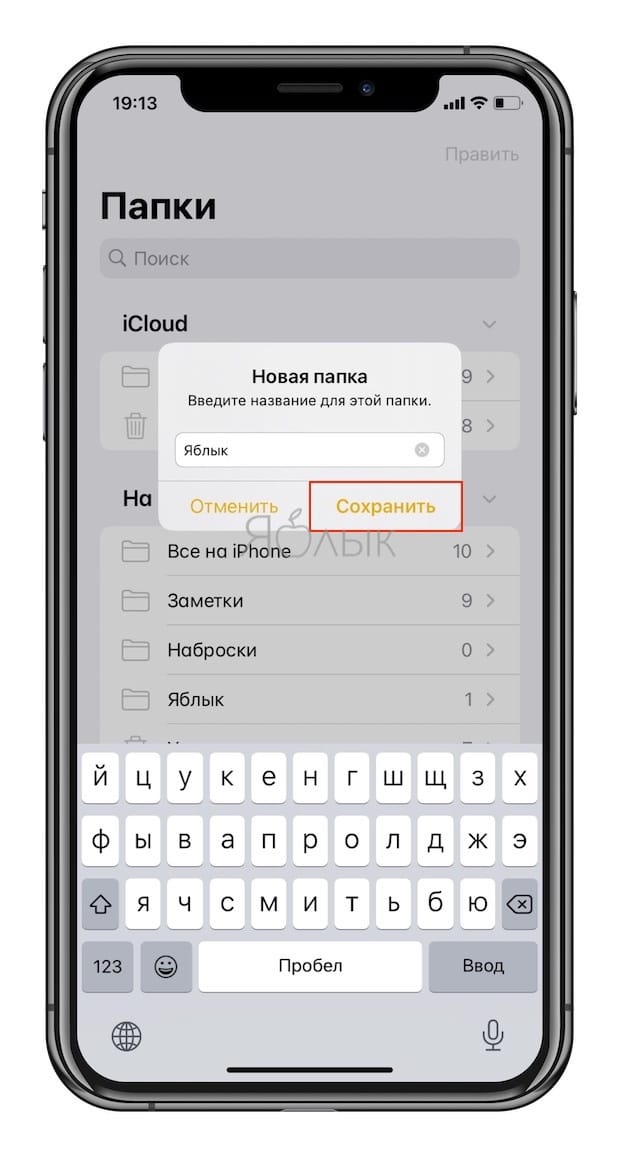
Enter a name for the folder and click Save.
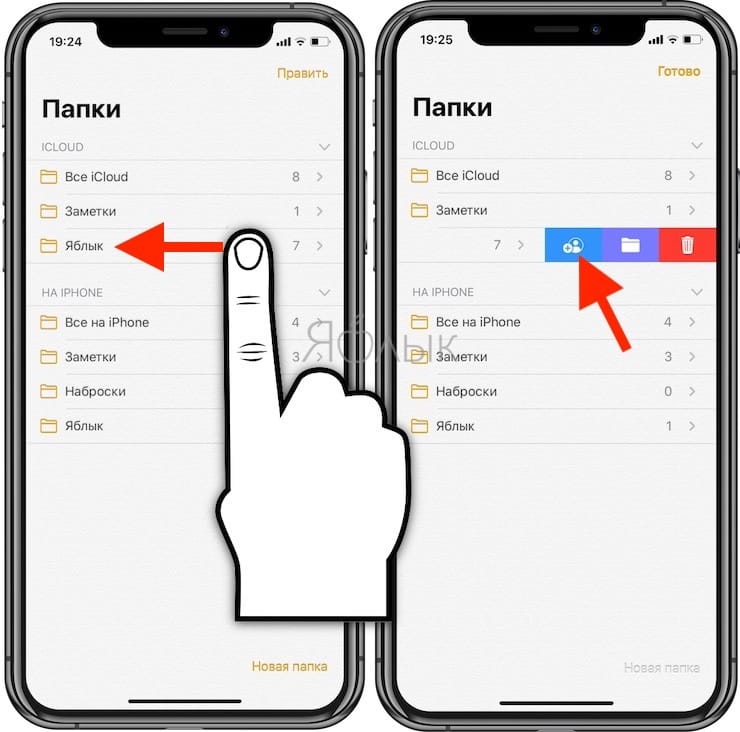
Swipe from right to left on the created folder and press the blue button “Add people“.
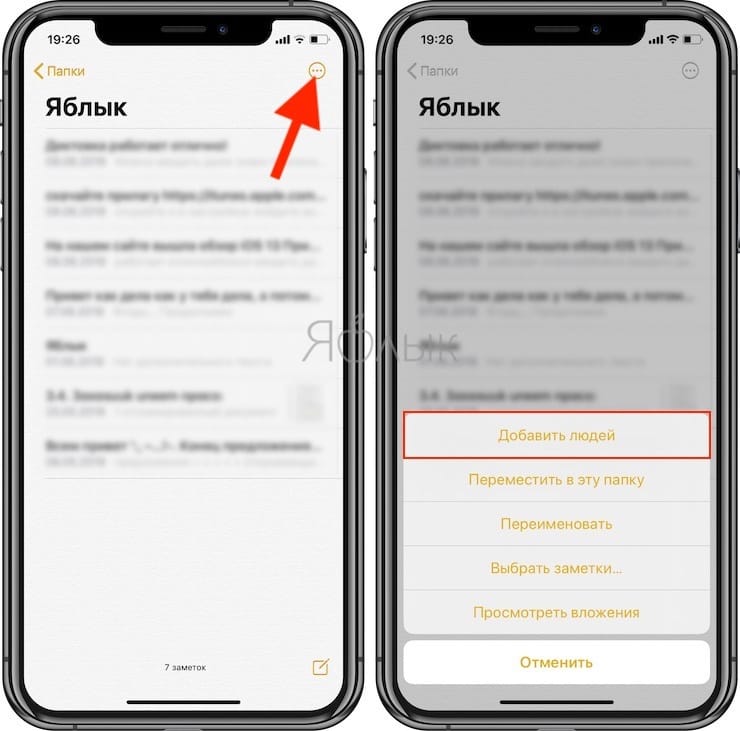
The same can be done by opening the folder by clicking the “Additionally” in the upper right corner and selecting “Add people“.
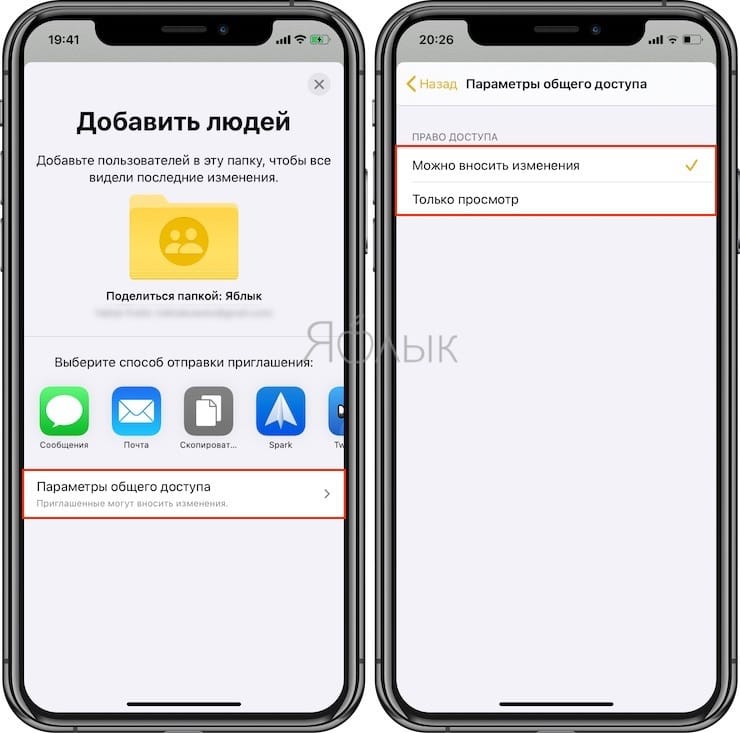
Choose how you want to send the invitation (you can also get the link to the folder by clicking “Copy link“).
Set sharing options. To do this, click “Sharing options‘ and select ‘Can make changes” or “View only“.
After the user receives an invitation and confirms it, the corresponding icon and inscription will appear on the folder.
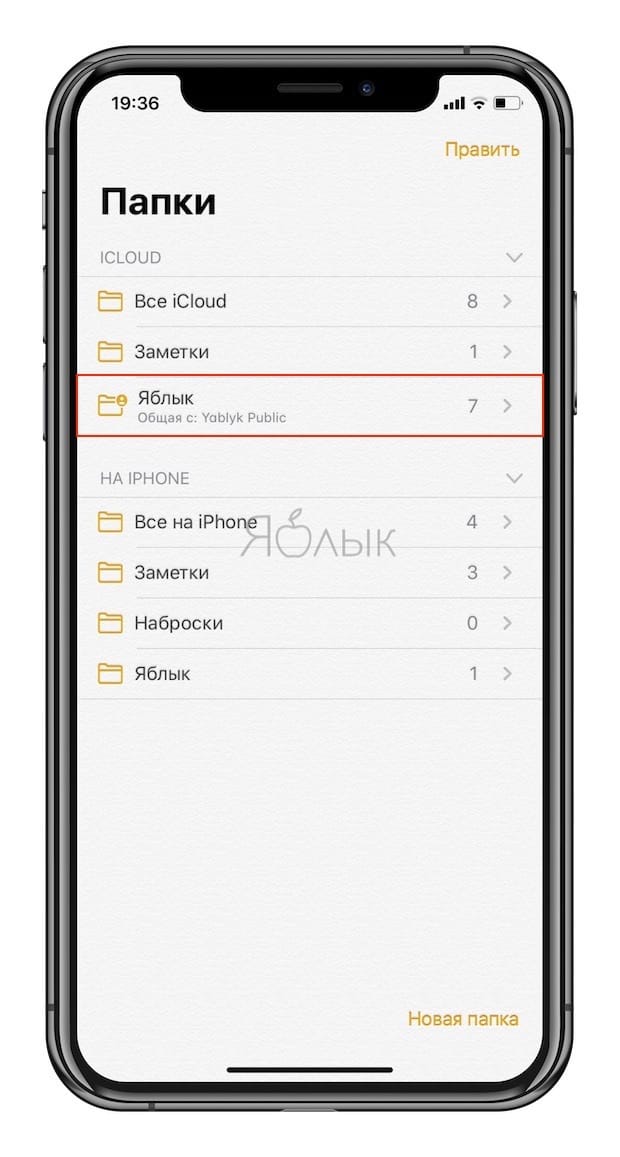
After completing these steps, the invited user will be able to view or edit (if they have such rights) the notes in the folder.
BY TOPIC: How to download videos from VK (VKontakte) to iPhone or iPad and watch without the Internet.
How to Create a Shared Note on iPhone and iPad
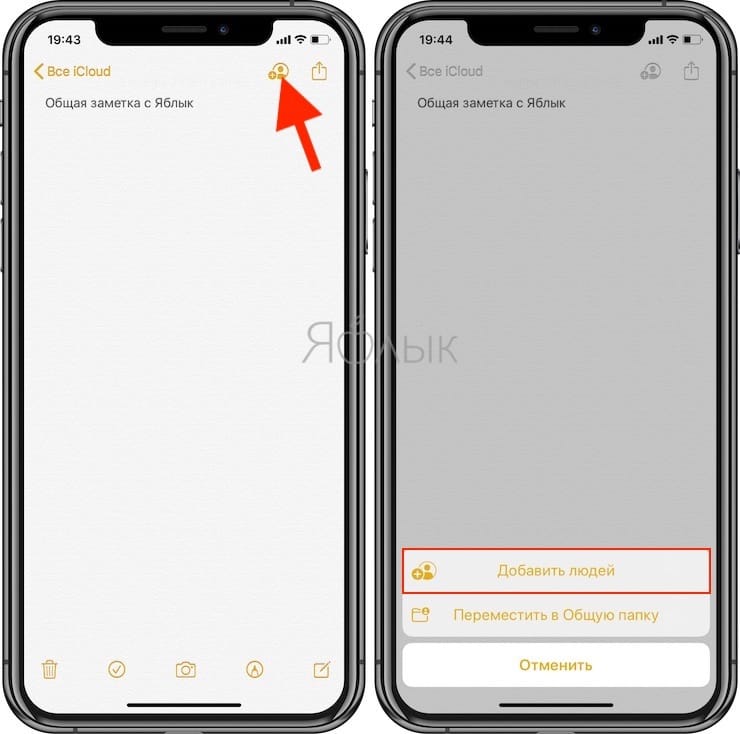
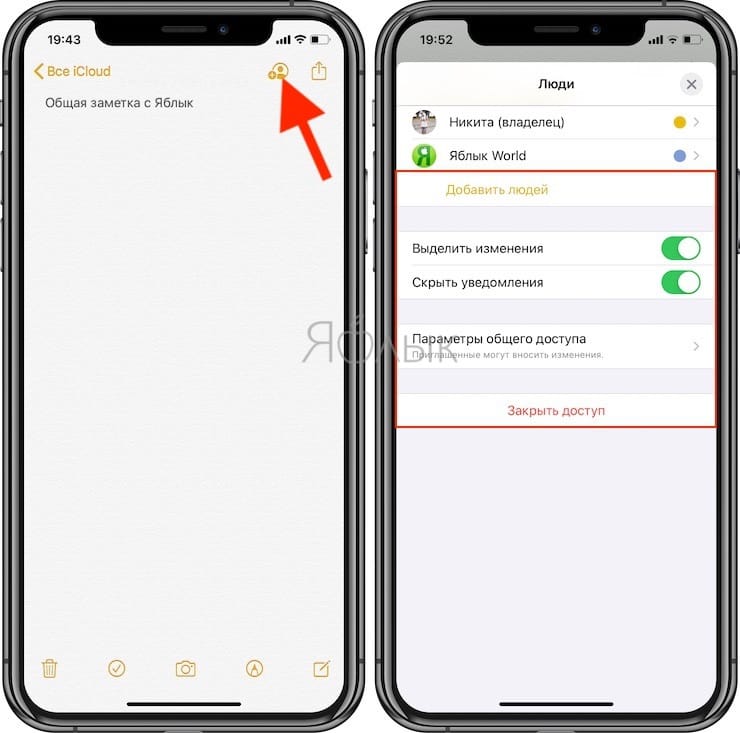
Open the note you’d like to share and tap the “Add people” in the upper right corner and selecting “Add people“.
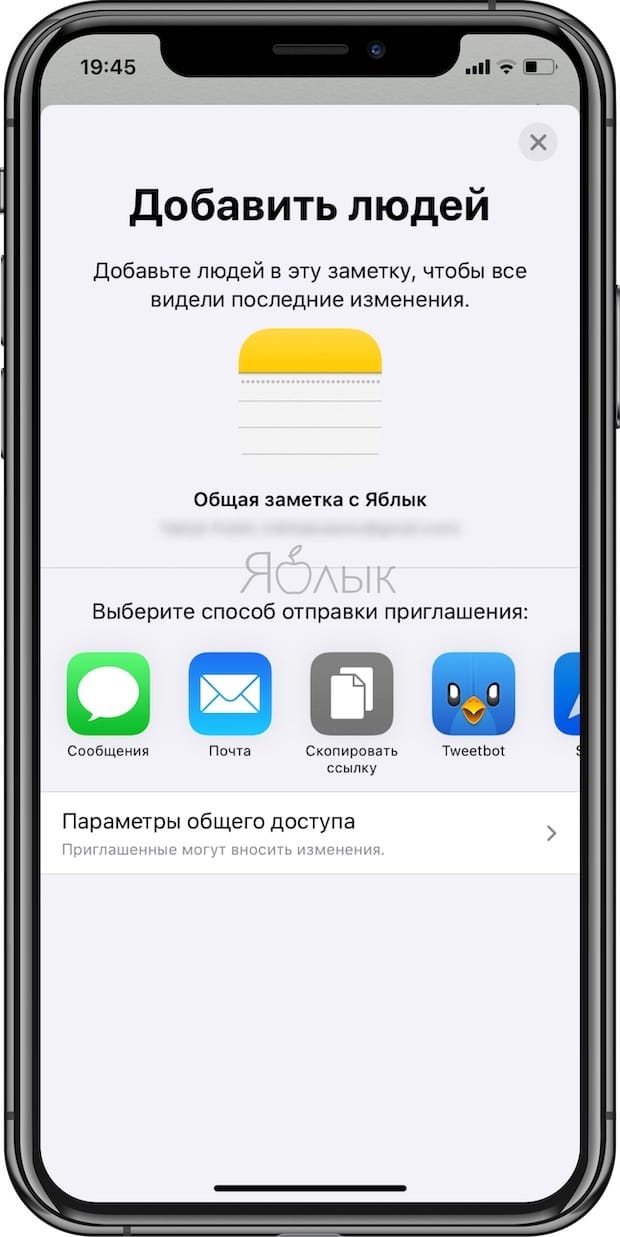
Choose how you want to send the invitation (you can also get the link to the folder by clicking “Copy link“).
Set sharing options. To do this, click “Sharing options‘ and select ‘Can make changes” or “View only“.
After the user receives the invitation and confirms it, the corresponding icon will appear on the note.
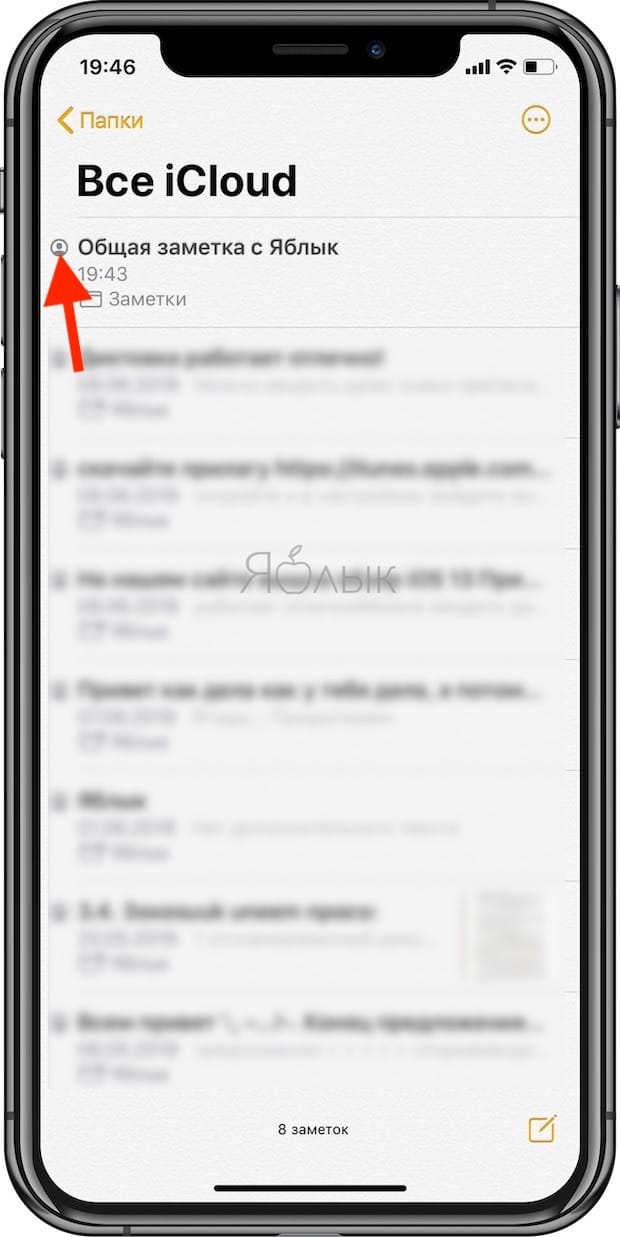
After completing these steps, the invited user will be able to view or edit (if they have such rights) the shared note.
To get more control over the changes made in the general note, set up a few more advanced options.
Open Shared Notes and tap the “Add people” in the upper right corner. If you want to highlight all changes and/or hide notifications, simply activate the appropriate radio buttons. These settings will be applied if your members have the rights to make changes. The settings will highlight the created changes in the text and send you notifications about the changes made.
BY TOPIC: How to block all calls from unknown and hidden numbers on iPhone: 2 ways.
How to change the sharing settings of a folder or note
Once you’ve shared a note or folder in the Notes app on iOS, you can still edit or stop accessing it.
To change permissions in general for all users who have been granted access to a folder or note, open the folder or note and tap the “Add people” in the upper right corner.
Select the option “Close access” if you need to stop sharing a folder or note, or go to the “Sharing options” and specify the access right.
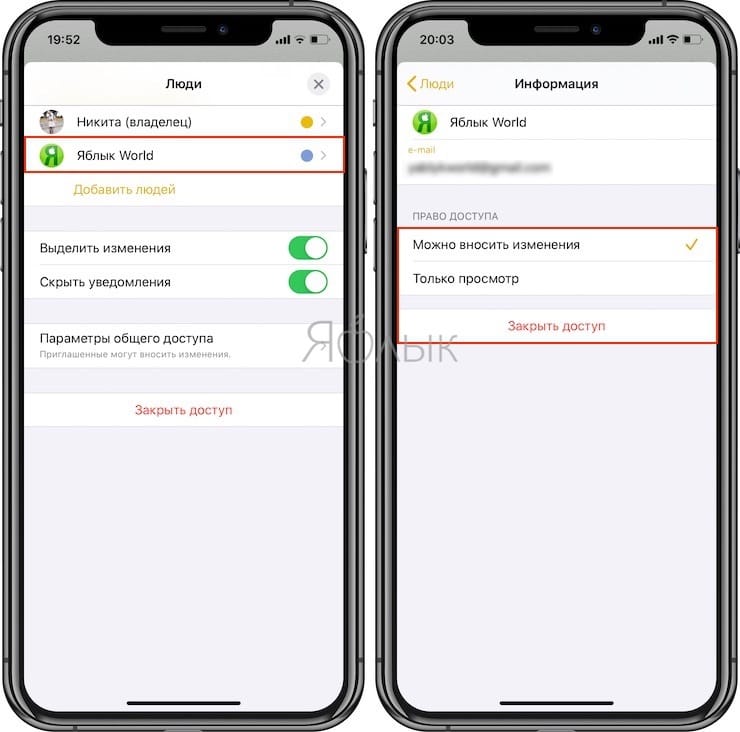
In addition, you can change the access right for select users only. To do this, after going to the screen “Add people» you will see a list of users to whom you have granted access to the folder or note, and the rights granted to them (“View Only” or “You can make changes”). Click on the desired name to change access rights if necessary, or to stop access to the folder (note) altogether.
BY TOPIC: How to create and open ZIP archives on iPhone and iPad without installing additional applications.
How to Share a View-Only or Editable Folder or Note on Mac
Open the Notes app on your Mac and use one of the following methods to share a note or folder.
Click the buttonAdditionally” next to the folder in the sidebar and select “Add people“. This method is only suitable for folder sharing.
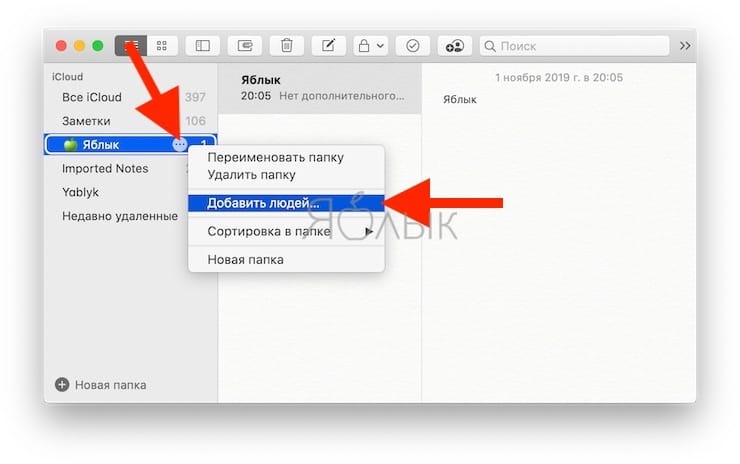
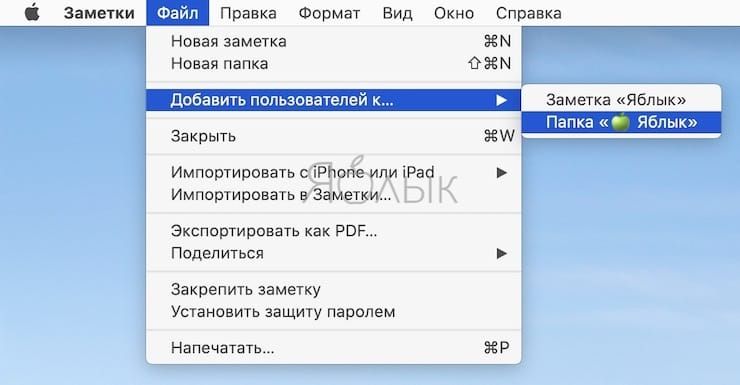
Click File → Add people to… and select a note or folder from the pop-up menu.
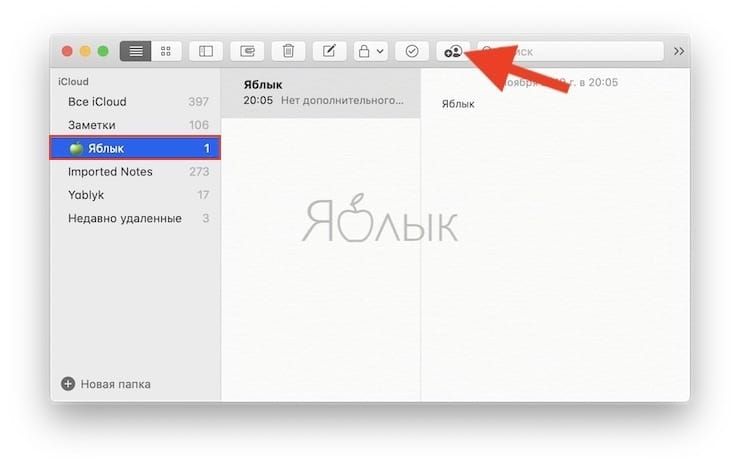
Click the button on the toolbar “Notes“, to “Add people to this note or folder”, and select a note or folder.
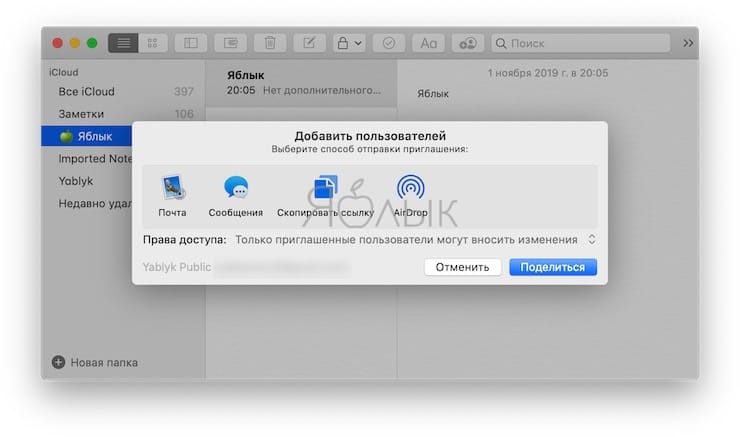
In the window that appears, select a method for sending an invitation, and also set up access rights: “Only invited users can make changes” or “Only invited users can view“.
Click “Share” and continue the process according to your choice.
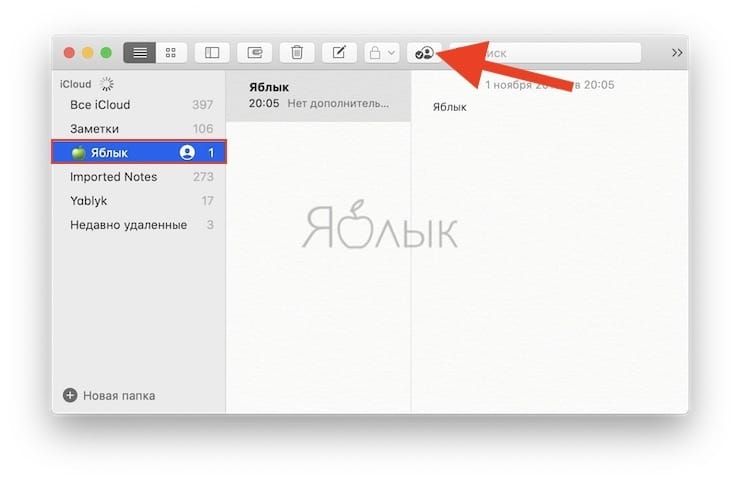
After completing these steps, the invited user will be able to view or edit (if they have such rights) the notes in the folder.
ON THIS TOPIC: Safari Download Manager on iPhone and iPad: how to use it, where is it located, where does it save files?
How to change the sharing settings of a folder or note
Once you share a note or folder in the Notes app, you can then make changes to the list of people you’ve invited.
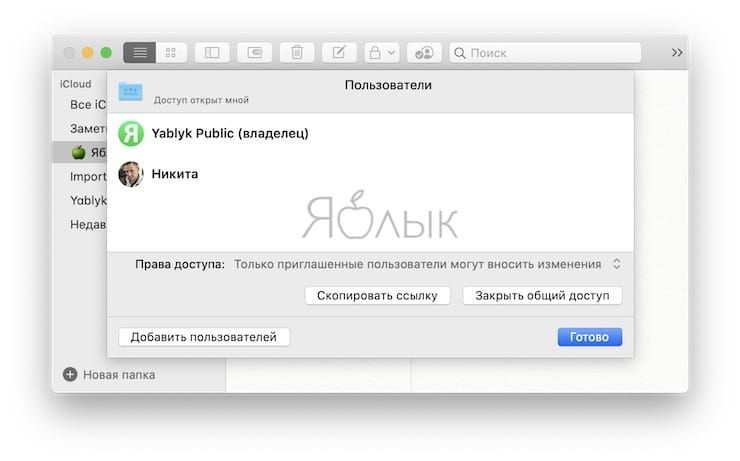
Open a shared folder or note and click the button on the Notes toolbar to “Add people to this note or folder“. You may notice that the button has a checkmark instead of a plus sign like when creating a note or folder exchange.
A small window will open showing the people you’ve shared with and the access you’re using. You can make a few changes if necessary.
- Access rights. Change the mode here from “view only” to “allow changes” or vice versa.
- Copy link. Click to copy the note link for later sharing.
- Stop sharing. Click to stop sharing the note or folder, and then confirm your action by clicking “Proceed“.
- Add Users. Click here to add people to a note or shared directory. If you select this option, an exchange window will appear. Be sure to set “Access rights» before pressing the button «Share“.
Whether you’re using the Notes app to collaborate at the office or share with your family, it’s great to see the improvement with shared folders and view-only options.
Let us know what you think of these updates to the Notes app. Are these features you’ve been waiting for so long?
See also:
.
The post How to share Notes on iPhone and iPad with others or make them read-only appeared first on Gamingsym.
