
Nextcloudは、無料のオープンソースのファイル共有および同期ソリューションであり、個人のドキュメント、ファイル、写真などを中央の場所に保存するのに役立ちます。 Dropbox、Googleドライブ、iCloudなどの他のクラウドストレージソリューションと非常によく似ています。自分のサーバーにNextcloudをインストールできるため、プライバシーが心配な場合はNextCloudに切り替える必要があります。 ファイルやその他のドキュメントをNextcloudサーバーにアップロードしてから、それらすべてをデスクトップPC、ラップトップ、またはスマートフォンに同期できます。
このチュートリアルでは、Ubuntu22.04サーバーにNextcloudをインストールする方法を紹介します。
要件
- Ubuntu22.04を実行しているサーバー。
- サーバーIPを指す有効なドメイン名。
- サーバーにrootパスワードが設定されています。
Apache、PHP、およびMariaDBをインストールします
開始する前に、LAMPスタックをサーバーにインストールする必要があります。 インストールされていない場合は、次のコマンドでインストールできます。
apt install apache2 mariadb-server php php-cli php-fpm php-json php-intl php-imagick php-pdo php-mysql php-zip php-gd php-mbstring php-curl php-xml php-pear php-bcmath apache2 libapache2-mod-php -y
すべてのパッケージをインストールした後、PHP構成ファイルを編集し、いくつかのデフォルト設定を変更します。
nano /etc/php/8.1/apache2/php.ini
次の行を変更します。
date.timezone = UTC
memory_limit = 512M
upload_max_filesize = 500M
post_max_size = 500M
max_execution_time = 300
ファイルを保存して閉じてから、Apacheサービスを再起動して変更を適用します。
systemctl restart apache2
Nextcloud用のデータベースを作成する
NextcloudはMariaDBデータベースをデータベースバックエンドとして使用するため、MariaDBでデータベースとユーザーを作成する必要があります。
まず、次のコマンドを使用してMariaDBシェルに接続します。
mysql
MariaDBに接続したら、次のコマンドを使用してデータベースとユーザーを作成します。
CREATE DATABASE nextcloud;
CREATE USER 'nextcloud'@'localhost' identified by 'password';
次に、次のコマンドを使用して、Nextcloudデータベースにすべての権限を付与します。
GRANT ALL PRIVILEGES ON nextcloud.* TO 'nextcloud'@'localhost';
次に、特権をフラッシュし、次のコマンドでMariaDBを終了します。
FLUSH PRIVILEGES;
QUIT;
Nextcloudをダウンロード
記事を書いている時点で、Nextcloudの最新バージョンは24.0.1です。 次のコマンドでダウンロードできます。
wget https://download.nextcloud.com/server/releases/nextcloud-24.0.1.zip
ダウンロードが完了したら、次のコマンドを使用してダウンロードしたファイルを解凍します。
unzip nextcloud-24.0.1.zip
次に、次のコマンドを使用して、抽出したディレクトリをApacheWebルートに移動します。
mv nextcloud /var/www/html/
次に、次のコマンドを使用して、Nextcloudディレクトリの所有権と権限を変更します。
chown -R www-data:www-data /var/www/html/nextcloud
chmod -R 775 /var/www/html/nextcloud
Nextcloud用のApache仮想ホストを作成する
次に、Nextcloud用のApache仮想ホスト構成ファイルを作成する必要があります。 次のコマンドで作成できます。
nano /etc/apache2/sites-available/next.conf
次の行を追加します。
<VirtualHost *:80>
     ServerAdmin [email protected]
     DocumentRoot /var/www/html/nextcloud
     ServerName next.example.com
     ErrorLog /var/log/apache2/nextcloud-error.log
     CustomLog /var/log/apache2/nextcloud-access.log combined

    <Directory /var/www/html/nextcloud>
	Options +FollowSymlinks
	AllowOverride All
        Require all granted
 	SetEnv HOME /var/www/html/nextcloud
 	SetEnv HTTP_HOME /var/www/html/nextcloud
 	<IfModule mod_dav.c>
  	  Dav off
        </IfModule>
    </Directory>
</VirtualHost>
ファイルを保存して閉じてから、次のコマンドを使用してApache仮想ホストおよびその他の必要なApacheモジュールをアクティブ化します。
a2ensite next
a2enmod rewrite dir mime env headers
次に、Apacheサービスを再起動して、変更を適用します。
systemctl restart apache2
次のコマンドを使用して、Apacheのステータスを確認することもできます。
systemctl status apache2
次の出力でApacheステータスを取得します。
? apache2.service - The Apache HTTP Server
     Loaded: loaded (/lib/systemd/system/apache2.service; enabled; vendor preset: enabled)
     Active: active (running) since Fri 2022-06-17 15:04:27 UTC; 4s ago
       Docs: https://httpd.apache.org/docs/2.4/
    Process: 16746 ExecStart=/usr/sbin/apachectl start (code=exited, status=0/SUCCESS)
   Main PID: 16750 (apache2)
      Tasks: 6 (limit: 2292)
     Memory: 14.7M
        CPU: 98ms
     CGroup: /system.slice/apache2.service
             ??16750 /usr/sbin/apache2 -k start
             ??16751 /usr/sbin/apache2 -k start
             ??16752 /usr/sbin/apache2 -k start
             ??16753 /usr/sbin/apache2 -k start
             ??16754 /usr/sbin/apache2 -k start
             ??16755 /usr/sbin/apache2 -k start

Jun 17 15:04:27 ubuntu2204 systemd[1]: Starting The Apache HTTP Server...
NextcloudWebインターフェイスにアクセスする
次に、Webブラウザーを開き、URLを使用してNextcloudWebUIにアクセスします。 http://next.example.com。 次の画面が表示されます。
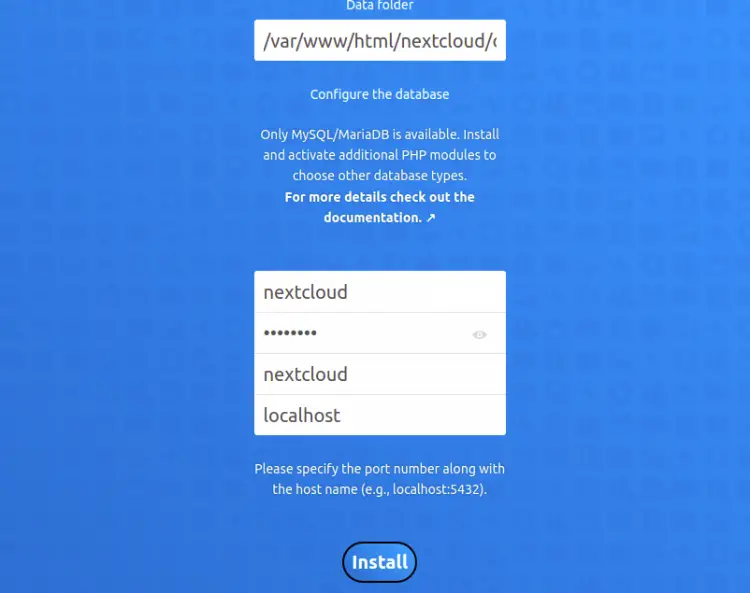
管理者のユーザー名、パスワード、データベースを定義し、をクリックします インストール ボタン。 Nextcloudがインストールされると、次の画面が表示されます。
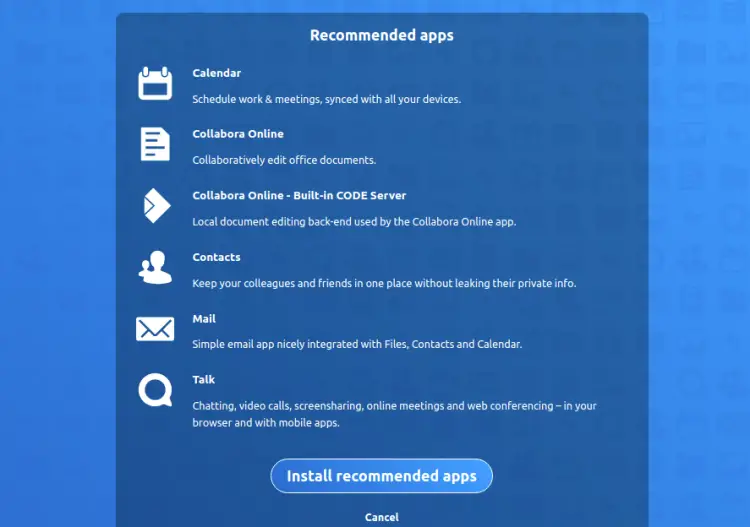
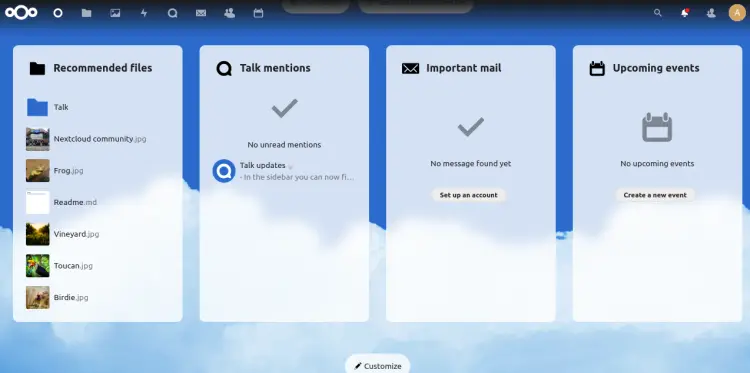
クリックしてください インストール おすすめされた アプリ 必要なすべてのアプリケーションをインストールします。 次の画面が表示されます。
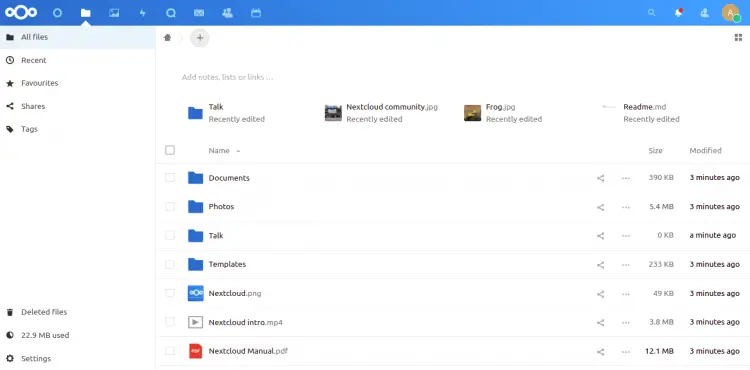
クリックしてください 全て ファイル。 次の画面にNextcloudストレージマネージャーが表示されます。
クリックしてください 君の 写真。 次の画面にNextcloudフォトマネージャーが表示されます。
NextcloudでSSLを有効にする
安全な通信のために、NextcloudドメインでSSLを有効にすることもお勧めします。 まず、次のコマンドを使用してCertbotパッケージをインストールします。
apt-get install python3-certbot-apache -y
インストールしたら、次のコマンドを実行して、Let’sEncryptSSLを使用してWebサイトを保護します。
certbot --apache -d next.example.com
以下に示すように、メールアドレスを提供し、利用規約に同意するよう求められます。
Saving debug log to /var/log/letsencrypt/letsencrypt.log
Plugins selected: Authenticator standalone, Installer None
Enter email address (used for urgent renewal and security notices) (Enter 'c' to
cancel): [email protected]

- - - - - - - - - - - - - - - - - - - - - - - - - - - - - - - - - - - - - - - -
Please read the Terms of Service at
https://letsencrypt.org/documents/LE-SA-v1.2-November-15-2017.pdf. You must
agree in order to register with the ACME server at
https://acme-v02.api.letsencrypt.org/directory
- - - - - - - - - - - - - - - - - - - - - - - - - - - - - - - - - - - - - - - -
(A)gree/(C)ancel: A

- - - - - - - - - - - - - - - - - - - - - - - - - - - - - - - - - - - - - - - -
Would you be willing to share your email address with the Electronic Frontier
Foundation, a founding partner of the Let's Encrypt project and the non-profit
organization that develops Certbot? We'd like to send you email about our work
encrypting the web, EFF news, campaigns, and ways to support digital freedom.
- - - - - - - - - - - - - - - - - - - - - - - - - - - - - - - - - - - - - - - -
(Y)es/(N)o: Y
Plugins selected: Authenticator apache, Installer apache
Obtaining a new certificate
Performing the following challenges:
http-01 challenge for next.example.com
Enabled Apache rewrite module
Waiting for verification...
Cleaning up challenges
Created an SSL vhost at /etc/apache2/sites-available/next-le-ssl.conf
Enabled Apache socache_shmcb module
Enabled Apache ssl module
Deploying Certificate to VirtualHost /etc/apache2/sites-available/next-le-ssl.conf
Enabling available site: /etc/apache2/sites-available/next-le-ssl.conf
次に、以下に示すように、HTTPトラフィックをHTTPSにリダイレクトするかどうかを選択します。
Please choose whether or not to redirect HTTP traffic to HTTPS, removing HTTP access.
- - - - - - - - - - - - - - - - - - - - - - - - - - - - - - - - - - - - - - - -
1: No redirect - Make no further changes to the webserver configuration.
2: Redirect - Make all requests redirect to secure HTTPS access. Choose this for
new sites, or if you're confident your site works on HTTPS. You can undo this
change by editing your web server's configuration.
- - - - - - - - - - - - - - - - - - - - - - - - - - - - - - - - - - - - - - - -
Select the appropriate number [1-2] then [enter] (press 'c' to cancel): 2
2と入力し、Enterキーを押して、WebサイトにLet’sEncryptSSLをインストールします。
Enabled Apache rewrite module
Redirecting vhost in /etc/apache2/sites-enabled/next.conf to ssl vhost in /etc/apache2/sites-available/next-le-ssl.conf

- - - - - - - - - - - - - - - - - - - - - - - - - - - - - - - - - - - - - - - -
Congratulations! You have successfully enabled https://next.example.com

You should test your configuration at:
https://www.ssllabs.com/ssltest/analyze.html?d=next.example.com
- - - - - - - - - - - - - - - - - - - - - - - - - - - - - - - - - - - - - - - -

IMPORTANT NOTES:
 - Congratulations! Your certificate and chain have been saved at:
   /etc/letsencrypt/live/next.example.com/fullchain.pem
   Your key file has been saved at:
   /etc/letsencrypt/live/next.example.com/privkey.pem
   Your cert will expire on 2022-09-21. To obtain a new or tweaked
   version of this certificate in the future, simply run certbot again
   with the "certonly" option. To non-interactively renew *all* of
   your certificates, run "certbot renew"
 - If you like Certbot, please consider supporting our work by:

   Donating to ISRG / Let's Encrypt:   https://letsencrypt.org/donate
   Donating to EFF:                    https://eff.org/donate-le
結論
おめでとう! これで、Ubuntu22.04にApacheとLet’sEncryptSSLを使用してNextcloudが正常にインストールされました。 これで、ファイル、ドキュメント、写真をアップロードして、コンピューター、ラップトップ、およびモバイルデバイスと同期できます。
The post NginxでNextcloudをインストールし、Ubuntu22.04LTSでSSLを暗号化する方法 appeared first on Gamingsym Japan.