
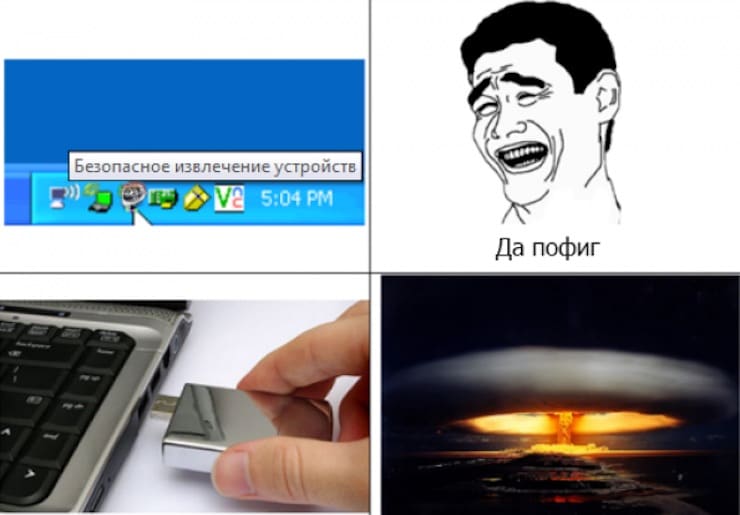
One of the first lessons in working with flash drives concerned removing them from a computer port. Everyone knows that you can’t turn off a flash drive unexpectedly, while information is being written to it. Yes, and at the end of the work it is necessary to carry out “Safely Remove” devices. But in Windows 10, the need to look for a small button in the tray and click on it to turn off the flash drive has disappeared. The October 2018 Update 1809 made life unexpectedly easier for millions of users. Microsoft said that the protection of external drives was implemented in Windows 7, but officially the implementation of such a solution was announced only in Windows 10.
BY TOPIC: 32-bit or 64-bit Windows: what’s the difference and which system should I install?
In fact, such a function in Windows has existed for a long time.
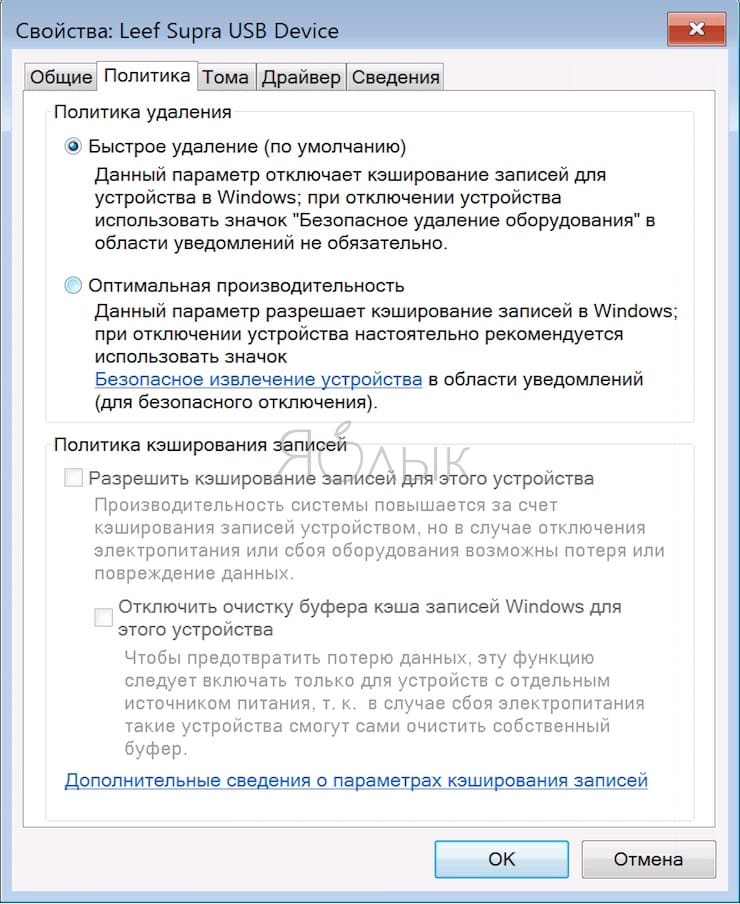
The behavior of the default function depends on the build of Windows. For external drives connected via USB or Thunderbolt, Windows has two main policies:Quick removal” and “Optimal Performance“. Windows 10 version 1809 has the former installed by default. Previously, the operating system focused on better device performance.
Windows allows you to set different policy settings for each external device. The system will remember them even after turning off the device. When it is turned on again to the same port, the specified parameters will be applied to the drive.
Any user can change the policy settings for their storage devices according to their needs. Two options are available with the following features:
Quick removal. This policy controls the exchange of data with external drives so that they can be removed from the system at any time. Thus, you can simply remove the USB flash drive from the USB port without a procedure. “Safely Remove”. But in order to implement this policy, Windows refused to cache writes to disk. Due to this, the data exchange rate has deteriorated.
Optimal performance. By applying this policy, the drive is handled in a way that maximizes data transfer performance. After applying the policy, Windows starts caching write operations when working with a flash drive. But to remove the device from the computer, you will have to use the procedure “Safely Remove”. It will protect the data on the device and ensure that all scheduled operations are completed.
In other words, if your computer is running Windows 10 build 1809 or higher, then “safely remove” is not required (although it remains on the system as an option).
The only thing, always remember that in any case, you can not remove flash drives and disks at the time of writing data to them. Any other time, no problem.
BY TOPIC: How to speed up Windows 10, 8 or 7 by disabling unnecessary operating system services.
How to change the policy for a connected external storage device (USB sticks, etc.) in Windows 10
1. Connect your drive to your computer.
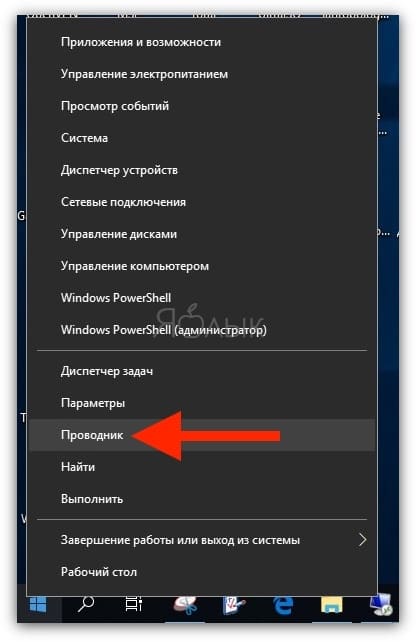
2. Right-click on the menu “Start” and select “Conductor“.
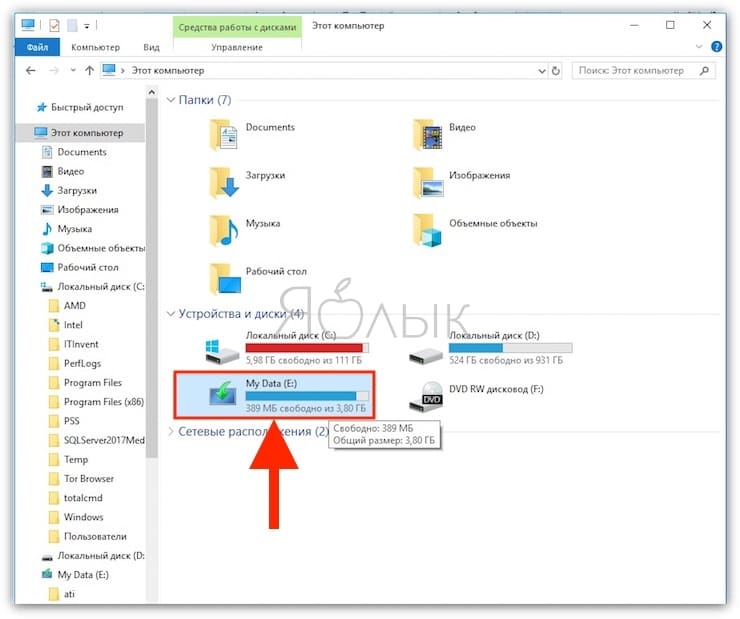
3. Determine the drive letter or label associated with the external drive. For example, it could be “My Data (E “.
“.
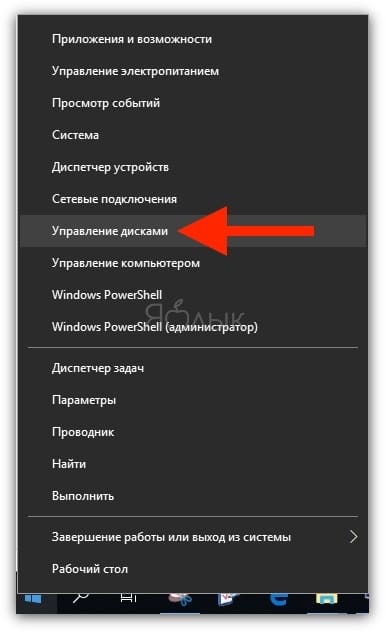
4. Now right click again on the menu “Start» and select the menu «Disk Management“.
5. In the lower part of the window, in the list of disks, find the drive, click on its title in the left column with the right mouse button and select the menu “Properties“.
6. In the new window, go to the “Politicians” and select the desired value for this device. When choosing an item,Optimal Performance”, you can additionally activate the item “Allow write caching for this device”, which will increase the speed of data exchange.

BY TOPIC: How to automatically switch the language (layout) on the keyboard in macOS or Windows.
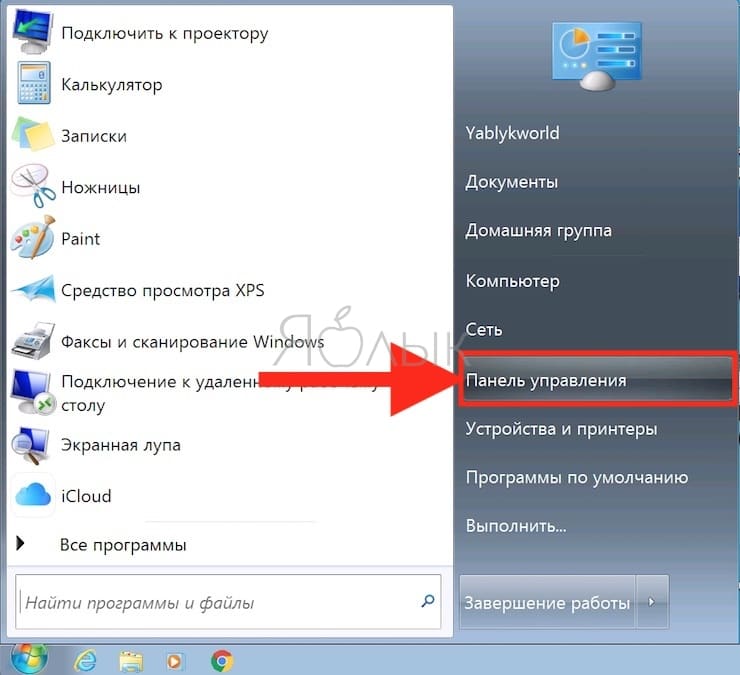
How to set up a computer to safely remove a USB flash drive or hard drive on older versions of Windows
In older versions of Windows, you can also enable the Safe Disable External Drives feature. To do this, you need to change the default enabled policy setting.
1. From the menu Start → Control Panel go to “Device Manager“.
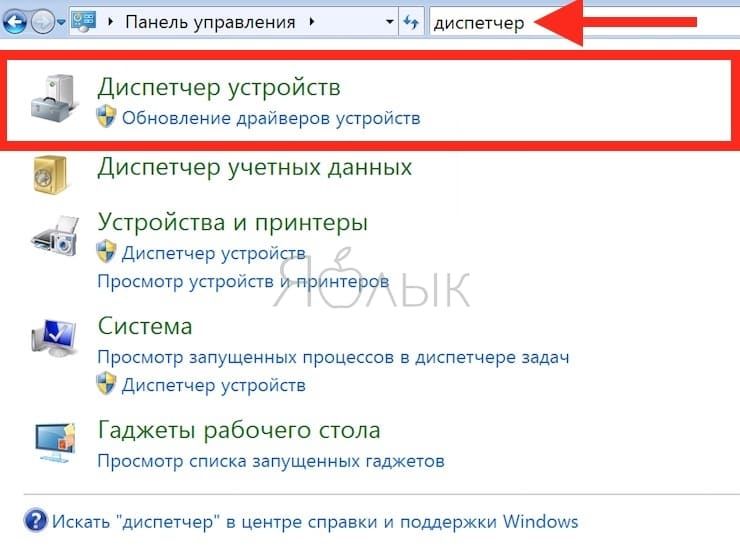
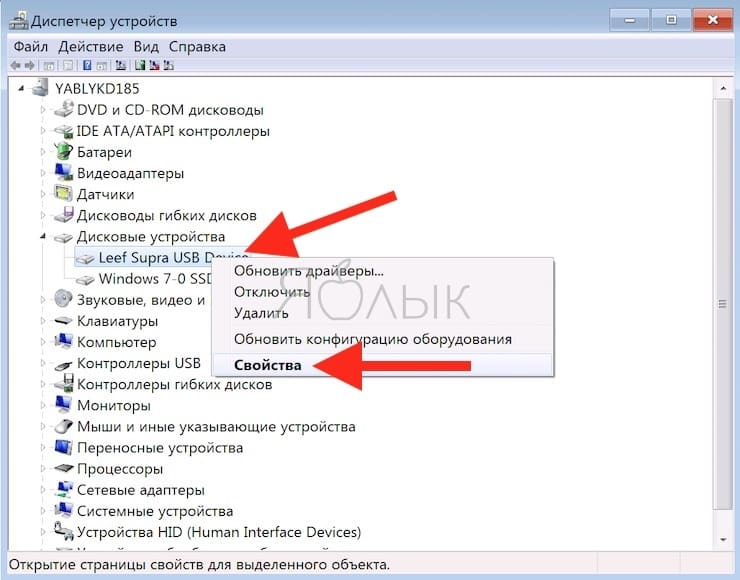
2. In the section “Disk devices» select your external drive and right click on it and select »Properties“.
3. In the tab “Politics» set the required parameter. To be able to safely turn off the device without additional manipulations, select the item “Quick removal“. Otherwise, when activating the second menu item, you will have to use the procedure “Safe device removal“.
See also:
.
The post How to configure Windows to eject USB flash drives and drives without using “Safely Remove” appeared first on Gamingsym.