
Joomlaは無料のオープンソースであり、最も人気のあるコンテンツ管理システムの1つです。 これはPHPで記述されており、プログラミングの知識がなくてもWebサイトやブログを作成するために使用されます。 それはあなたがウェブサイトの機能を拡張するのを助ける無料と有料のプラグインとテーマを提供します。 これは、WebブラウザからWebサイトを管理するためのイニシアチブコントロールパネルを提供します。 Joomlaは、多言語サポート、メディアマネージャー、SEO、統合ヘルプシステム、連絡先管理など、非常に便利な機能を提供します。
このチュートリアルでは、Apacheを使用してJoomlaCMSをインストールする方法とAlmaLinux8にSSLを暗号化する方法を学習します。
前提条件
- AlmaLinux8を実行しているサーバー。
- サーバーIPで指定された有効なドメイン名。
- ルートパスワードはサーバーで構成されます。
LAMPサーバーをインストールする
Joomlaは、PHPで記述されたWebサーバー上で実行され、MariaDBをデータベースバックエンドとして使用します。 そのため、システムにLAMPサーバーをインストールする必要があります。 次のコマンドでインストールできます。
dnf install httpd @mariadb php php-curl php-xml php-zip php-mysqlnd php-intl php-gd php-json php-ldap php-mbstring php-opcache unzip curl wget -y
インストールが完了したら、PHP構成ファイルを編集し、デフォルト設定を変更します。
nano /etc/php.ini
次の行を変更します。
memory_limit = 256M
output_buffering = Off
max_execution_time = 300
date.timezone = UTC
ファイルを保存して閉じ、Apacheサービスを開始し、システムの再起動後に開始できるようにします。
systemctl start httpd mariadb
systemctl enable httpd mariadb
MariaDBデータベースを構成する
次に、JoomlaCMSのデータベースとユーザーを作成する必要があります。 まず、次のコマンドを使用してMariaDBシェルに接続します。
mysql
ログインしたら、次のコマンドを使用してデータベースとユーザーを作成します。
MariaDB [(none)]> CREATE DATABASE joomla;
MariaDB [(none)]> GRANT ALL PRIVILEGES ON joomla.* TO 'joomla'@'localhost' IDENTIFIED BY "securepassword";
次に、権限をリロードして変更を適用します。
MariaDB [(none)]> FLUSH PRIVILEGES;
次に、次のコマンドを使用してMariaDBシェルを終了します。
MariaDB [(none)]> EXIT;
終了したら、次のステップに進むことができます。
JoomlaCMSをダウンロードする
このチュートリアルを書いている時点で、利用可能な最新バージョンはJoomla4.1.2です。 次のコマンドを使用して、公式ダウンロードページからダウンロードできます。
wget https://downloads.joomla.org/cms/joomla4/4-1-2/Joomla_4-1-2-Stable-Full_Package.zip?format=zip -O joomla.zip
ダウンロードが完了したら、次のコマンドを使用して、ダウンロードしたファイルをApacheWebルートディレクトリに解凍します。
unzip joomla.zip -d /var/www/html/joomla
次に、Joomlaディレクトリの所有権と権限を変更します。
chown -R apache:apache /var/www/html/joomla/
chmod -R 775 /var/www/html/joomla/
完了したら、次のステップに進むことができます。
Joomla用にApacheを設定する
次に、Joomla用のApache仮想ホスト構成ファイルを作成する必要があります。 次のコマンドで作成できます。
nano /etc/httpd/conf.d/joomla.conf
次のコードを追加します。
<VirtualHost *:80>
   ServerAdmin [email protected]
   DocumentRoot "/var/www/html/joomla"
   ServerName joomla.example.com
   ErrorLog "/var/log/httpd/example.com-error_log"
   CustomLog "/var/log/httpd/example.com-access_log" combined

<Directory "/var/www/html/joomla">
   DirectoryIndex index.html index.php
   Options FollowSymLinks
   AllowOverride All
   Require all granted
</Directory>
</VirtualHost>
ファイルを保存して閉じてから、Apacheサービスを再起動して、構成の変更を適用します。
systemctl restart httpd
次のコマンドを使用して、ApacheWebサーバーのステータスを確認できるようになりました。
systemctl status httpd
次の出力が得られます。
? httpd.service - The Apache HTTP Server
   Loaded: loaded (/usr/lib/systemd/system/httpd.service; disabled; vendor preset: disabled)
  Drop-In: /usr/lib/systemd/system/httpd.service.d
           ??php-fpm.conf
   Active: active (running) since Fri 2022-04-15 08:52:59 UTC; 3s ago
     Docs: man:httpd.service(8)
 Main PID: 4749 (httpd)
   Status: "Started, listening on: port 80"
    Tasks: 213 (limit: 11412)
   Memory: 24.3M
   CGroup: /system.slice/httpd.service
           ??4749 /usr/sbin/httpd -DFOREGROUND
           ??4751 /usr/sbin/httpd -DFOREGROUND
           ??4752 /usr/sbin/httpd -DFOREGROUND
           ??4753 /usr/sbin/httpd -DFOREGROUND
           ??4754 /usr/sbin/httpd -DFOREGROUND

Apr 15 08:52:59 linux systemd[1]: httpd.service: Succeeded.
Apr 15 08:52:59 linux systemd[1]: Stopped The Apache HTTP Server.
Apr 15 08:52:59 linux systemd[1]: Starting The Apache HTTP Server...
Apacheの構成が完了したら、次のステップに進むことができます。
Joomlaのファイアウォールを構成する
次に、ファイアウォールを介したHTTPおよびHTTPSサービスを許可する必要があります。 次のコマンドでそれらを許可できます。
firewall-cmd --add-service=http --zone=public --permanent
firewall-cmd --add-service=https --zone=public --permanent
次に、firewalldをリロードして、変更を適用します。
firewall-cmd --reload
JoomlaWebインストールウィザードにアクセスする
次に、Webブラウザーを開き、URLを使用してJoomlaインストールにアクセスします。 http://joomla.example.com。 次の画面にリダイレクトされます。
言語を選択し、ウェブサイト名を入力してから、 ログインデータの設定。 管理者設定画面が表示されます。
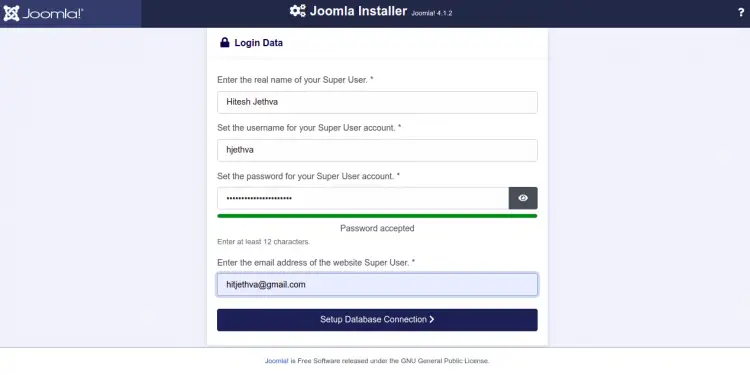
管理者のユーザー名とパスワードを入力し、をクリックします データベース接続のセットアップ。 次の画面が表示されます。
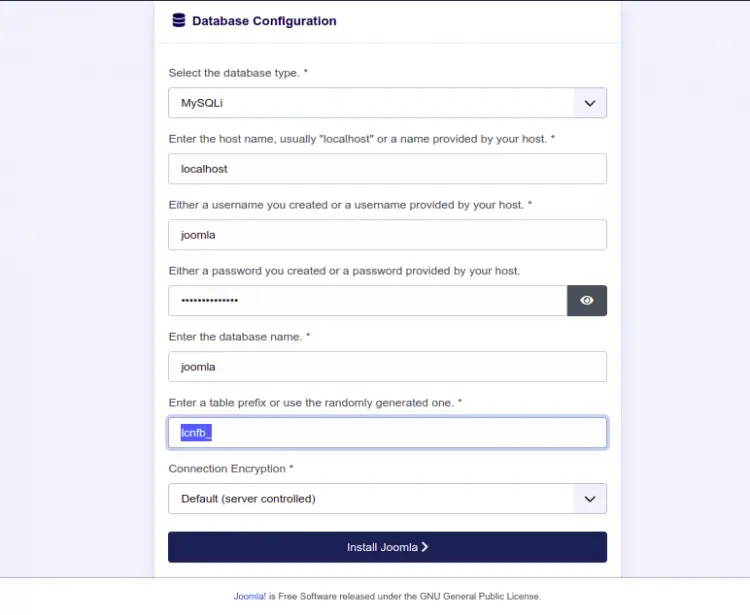
データベース名、ユーザー名、パスワードを入力し、をクリックします Joomlaをインストールする ボタン。 Joomlaをインストールすると、次の画面が表示されます。
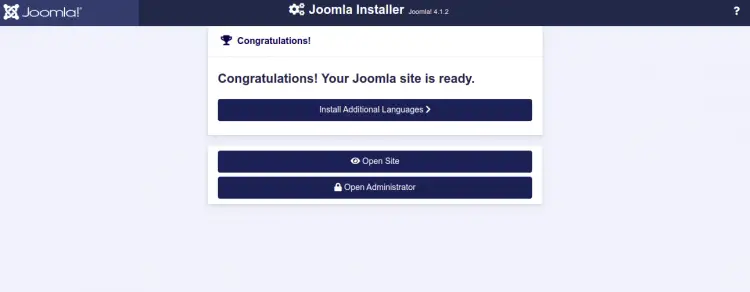
クリックしてください 管理者を開く ボタン。 Joomlaのログイン画面が表示されます。
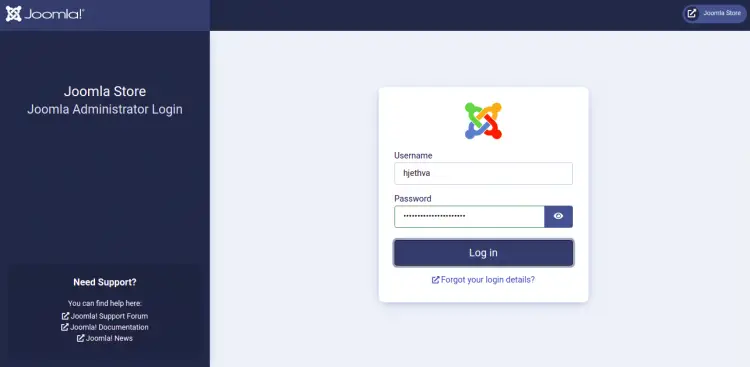
管理者のユーザー名とパスワードを入力し、をクリックします ログイン ボタン。 次の画面にJoomlaダッシュボードが表示されます。
広告
Let’sEncryptSSLで安全なJoomlaCMS
次に、Certbotクライアントをインストールして、WebサイトにLet’sEncryptSSLをインストールする必要があります。 次のコマンドでインストールできます。
dnf install epel-release -y
dnf install certbot python3-certbot-apache
次に、次のコマンドを使用して、letsドメインのSSL証明書を取得してインストールします。
certbot --apache -d joomla.example.com
メールアドレスを入力し、利用規約に同意するよう求められます。
Saving debug log to /var/log/letsencrypt/letsencrypt.log
Plugins selected: Authenticator apache, Installer apache
Enter email address (used for urgent renewal and security notices)
 (Enter 'c' to cancel): [email protected]

- - - - - - - - - - - - - - - - - - - - - - - - - - - - - - - - - - - - - - - -
Please read the Terms of Service at
https://letsencrypt.org/documents/LE-SA-v1.2-November-15-2017.pdf. You must
agree in order to register with the ACME server. Do you agree?
- - - - - - - - - - - - - - - - - - - - - - - - - - - - - - - - - - - - - - - -
(Y)es/(N)o: Y

- - - - - - - - - - - - - - - - - - - - - - - - - - - - - - - - - - - - - - - -
Would you be willing, once your first certificate is successfully issued, to
share your email address with the Electronic Frontier Foundation, a founding
partner of the Let's Encrypt project and the non-profit organization that
develops Certbot? We'd like to send you email about our work encrypting the web,
EFF news, campaigns, and ways to support digital freedom.
- - - - - - - - - - - - - - - - - - - - - - - - - - - - - - - - - - - - - - - -
(Y)es/(N)o: Y
Account registered.
Requesting a certificate for joomla.example.com
Performing the following challenges:
http-01 challenge for joomla.example.com
Waiting for verification...
Cleaning up challenges
Deploying Certificate to VirtualHost /etc/httpd/conf.d/joomla.conf
Redirecting all traffic on port 80 to ssl in /etc/httpd/conf.d/joomla.conf

- - - - - - - - - - - - - - - - - - - - - - - - - - - - - - - - - - - - - - - -
Congratulations! You have successfully enabled https://joomla.example.com
- - - - - - - - - - - - - - - - - - - - - - - - - - - - - - - - - - - - - - - -
Subscribe to the EFF mailing list (email: [email protected]).


IMPORTANT NOTES:
 - Congratulations! Your certificate and chain have been saved at:
   /etc/letsencrypt/live/joomla.example.com/fullchain.pem
   Your key file has been saved at:
   /etc/letsencrypt/live/joomla.example.com/privkey.pem
   Your certificate will expire on 2022-07-09. To obtain a new or
   tweaked version of this certificate in the future, simply run
   certbot again with the "certonly" option. To non-interactively
   renew *all* of your certificates, run "certbot renew"
 - If you like Certbot, please consider supporting our work by:

   Donating to ISRG / Let's Encrypt:   https://letsencrypt.org/donate
   Donating to EFF:                    https://eff.org/donate-le
結論
おめでとう! これで、JoomlaCMSとApacheおよびLet’sEncryptSSLがAlmaLinux8に正常にインストールされました。すばらしいJoomlaCMSを使用すると、プログラミングやコーディングの知識がなくても独自のWebサイトを構築できます。 ご不明な点がございましたら、お気軽にお問い合わせください。
The post Apacheと無料のJoomlaをインストールする方法AlmaLinux8でSSLを暗号化しましょう appeared first on Gamingsym Japan.